Follow this job aid to learn how to edit timesheet Labor Codes in HR Links.
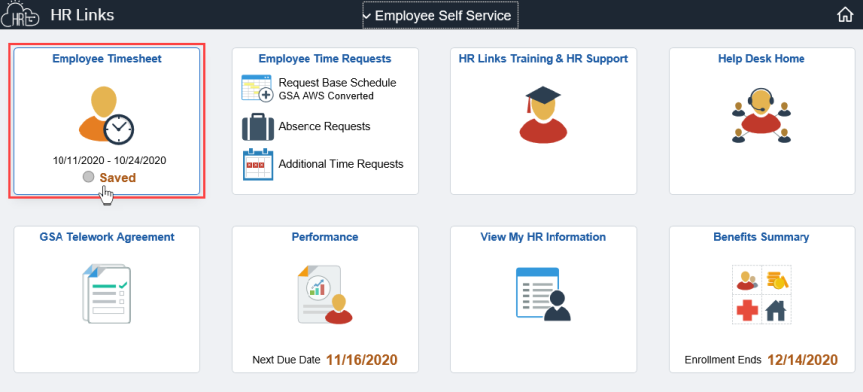
Select the Employee Timesheet tile on the Employee Self Service home page.
Note: The status information on the tile may take a few seconds to appear.
If you receive a pop-up message asking you to apply your base schedule, select Yes.
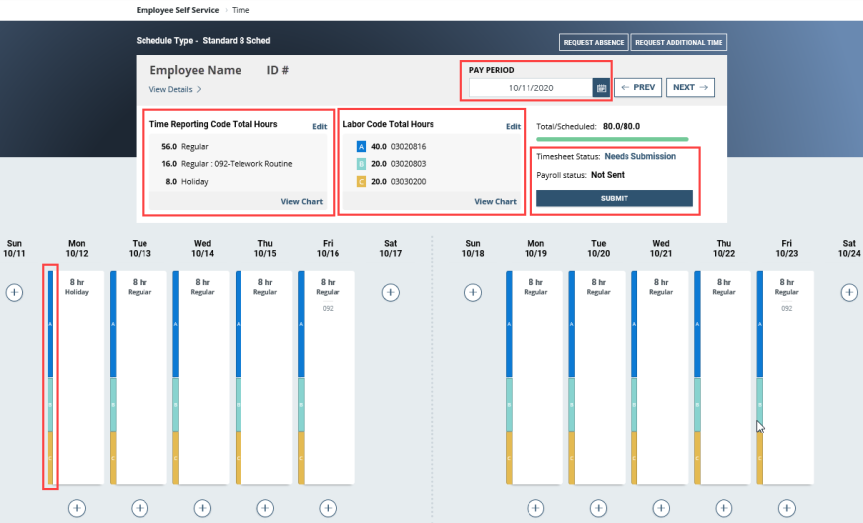
The Timesheet screen will appear, displaying the current pay period with your base schedule applied. You will see an information panel at the top of the screen:
- The Pay Period field will show the first day of the current pay period.
- Timesheet Status will initially read “No Timesheet” but will change to “Needs Submission” as you begin making changes to the timesheet.
- Payroll Status will be “Not Sent.”
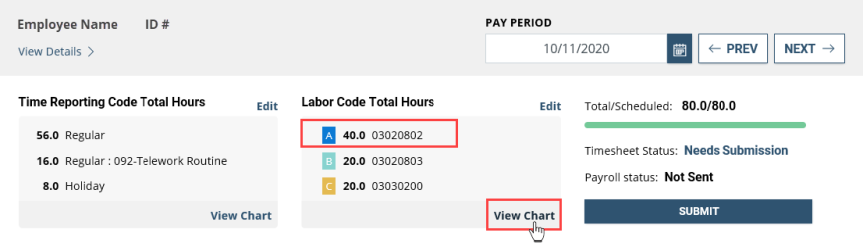
- The Time Reporting Code Total Hours section will provide a breakdown of your scheduled hours by Time Reporting Code or TRC.
If you are required to report labor codes when submitting your timesheet you will also see a Labor Code Total Hours section that provides a breakdown of the labor codes in your base schedule along with a color-coded key that also appears on the daily time blocks in the reported hours section below.
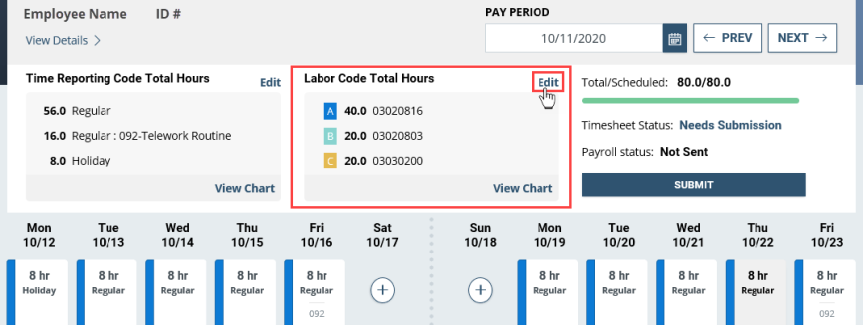
There are two ways to edit the Labor Code hours on your timesheet.
First, to change the codes without changing the overall hourly breakdown reflected in the Labor Code Total Hours summary for the pay period, click the Edit hyperlink in the upper right-hand corner of the section.
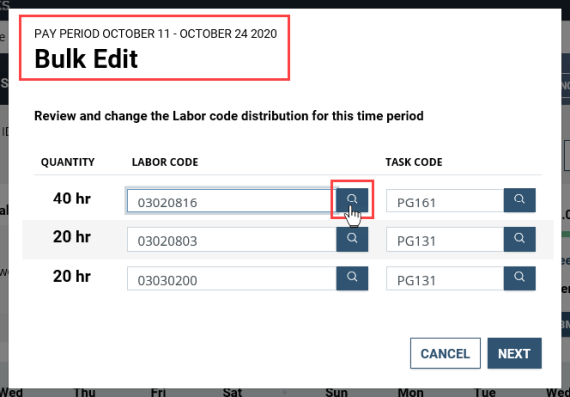
The Bulk Edit dialog box will appear containing your Labor and Task codes along with the hourly breakdown reflected in your base schedule.
You can edit these by removing a current code and typing in a replacement, or you can select the search icon next to the code you want to change to search for a replacement. Remember that you cannot change the hourly breakdown nor edit codes for a specific workday using this approach.
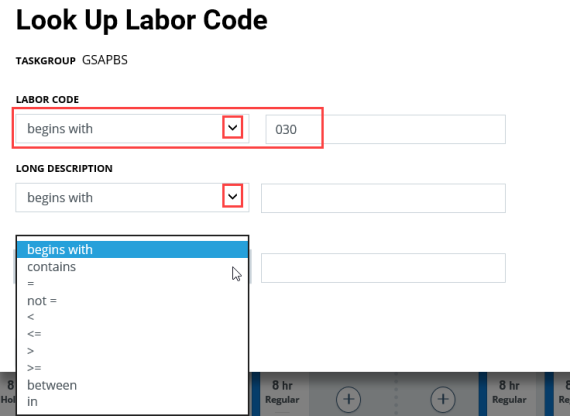
The Look Up Labor Code dialog box that appears next provides multiple ways to search for the code you need. Use the down arrows to choose parameters for searching by code number or description.
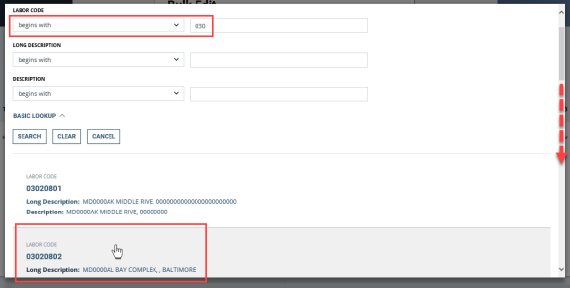
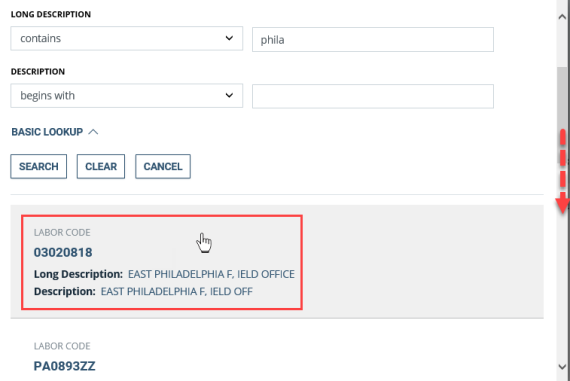
Your search results will be automatically added below; use the scroll bar on the far right side to navigate to the desired code and select it.
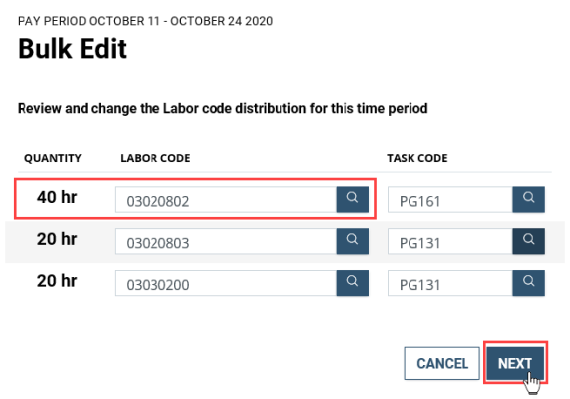
The code you selected has now replaced the original code (03020816) in the Bulk Edit dialog box; select Next.
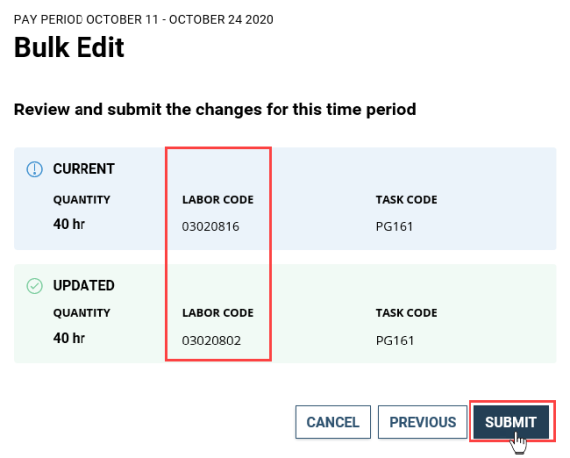
A new box will appear summarizing the change you are about to make; select Submit to complete the process.
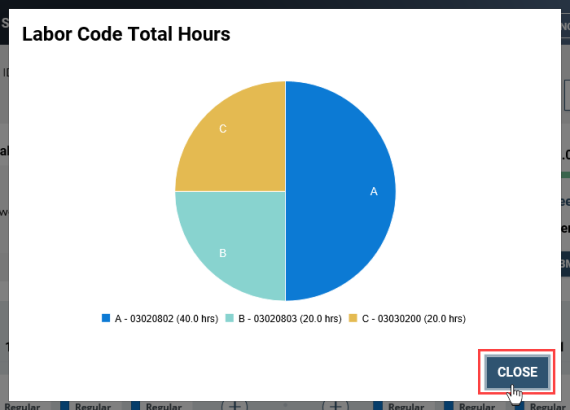
The new code has replaced the previous one in the “Labor Code Total Hours” summary. If desired, select the View Chart button in the lower right-hand corner to access a pie chart showing the Labor Code breakdown for the pay period.
Select the Close button to return to the timesheet screen.
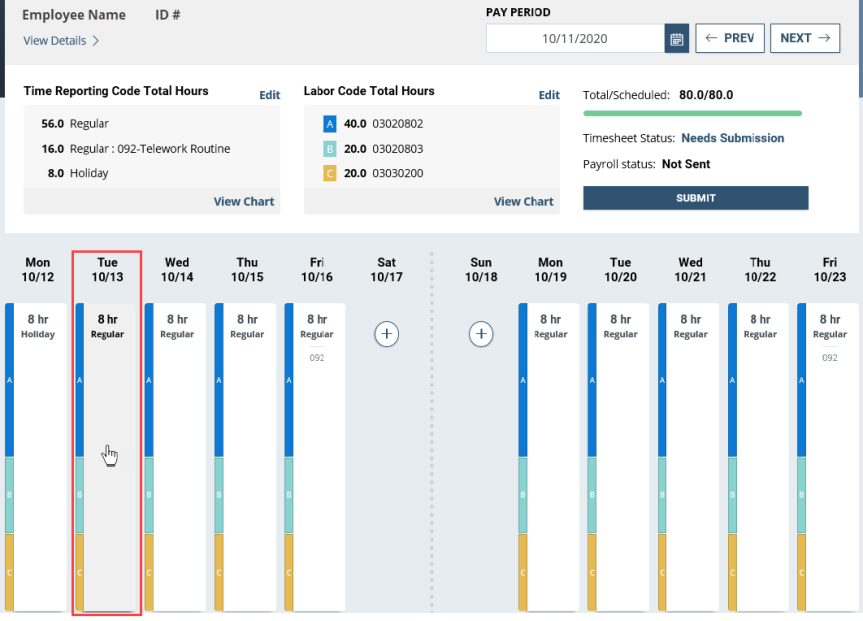
A second approach for editing labor codes is to select a time block for a specific day in the reported time section. In this example, Labor codes will be changed for 3 days of the pay period to capture non-routine work that was performed by an employee for a special project.
To start, select the time block for the first day you will be editing: Tuesday, 10/13.
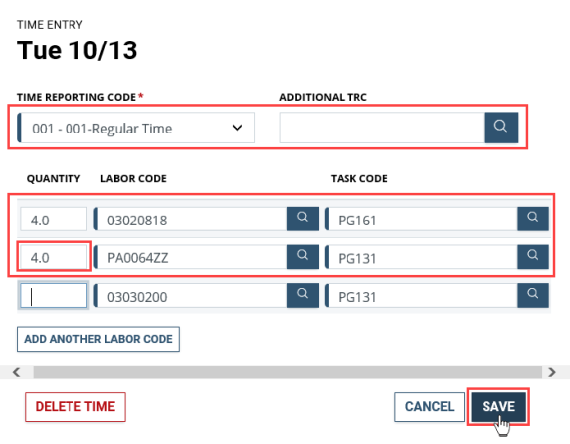
A dialog box will appear with the date you chose displayed at the top. To update the Labor Codes for that day, you can replace one or more existing codes with a new code if you already have it, or you can select the search icon next to the code you want to change to search for a replacement.
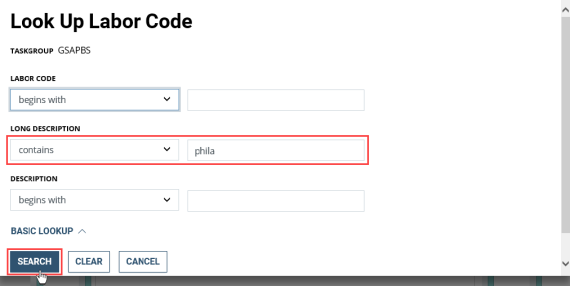
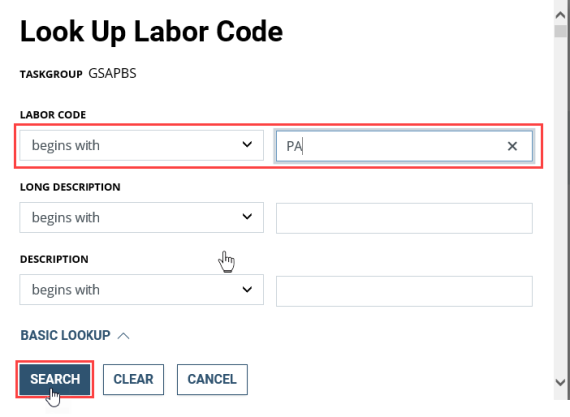
The Look Up Labor Code box appears, which enables you to enter parameters to search for codes numerically or by description. Enter the first few digits or letters of the code you are searching for, then select Search.
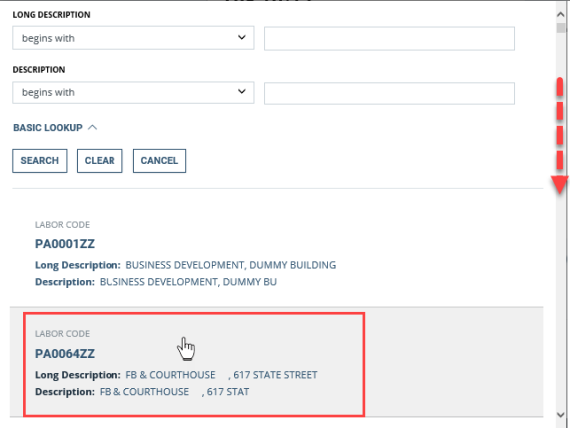
Your search results will be added to the box below the search criteria; use the scroll bar on the far right side to navigate down the list and select the code you need.
The Labor Code you selected has now replaced the original one.
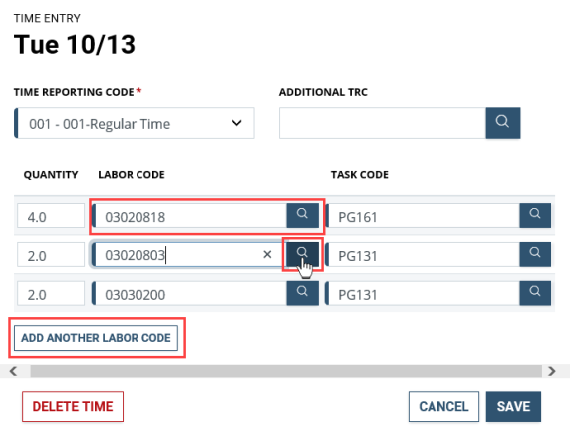
Choose the search icon next to each code you want to replace and repeat the steps above to search for additional codes. You can also select the Add Another Labor Code button to add more rows to the list.
A look-up box will be presented for each Labor Code to be added or replaced; enter criteria to narrow the search, then select Search.
Scroll down to the desired code and select it from the search results.
A second code has now been replaced. Once all required codes have been added to the list, update the Quantity fields to reflect the number of hours allocated to each labor code so that total hours do not exceed the daily maximum for the day (8.0 in this example). Any row with the quantity field left blank will not be reflected in the final result.
The Time Reporting Code and Additional TRC can also be updated for the day selected as well as the Task Codes using the process described above. Once all required changes have been made, select Save.
You will receive a confirmation message letting you know your changes have been captured successfully.
The Labor Codes have been updated for all three work days (10/13 through 10/15) using the steps described above. Since all three days were exactly the same, there was no need to search for the replacement codes when editing the second and third days.
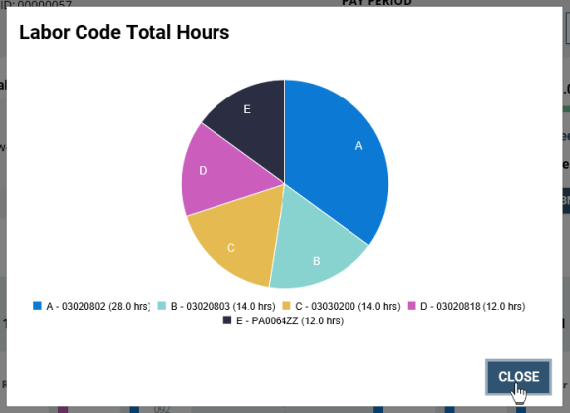
The changes are now reflected in the daily time blocks and in the Labor Code Total Hours summary, and the hourly breakdown has been adjusted accordingly. Select the View Chart hyperlink to see the changes graphically.
Select Close to return to the timesheet and complete any other changes needed before submitting it for approval. See the “Create a timesheet with labor codes” job aid for further information.

 U.S. General Services Administration